How To Modify Invoice Template In Quickbooks
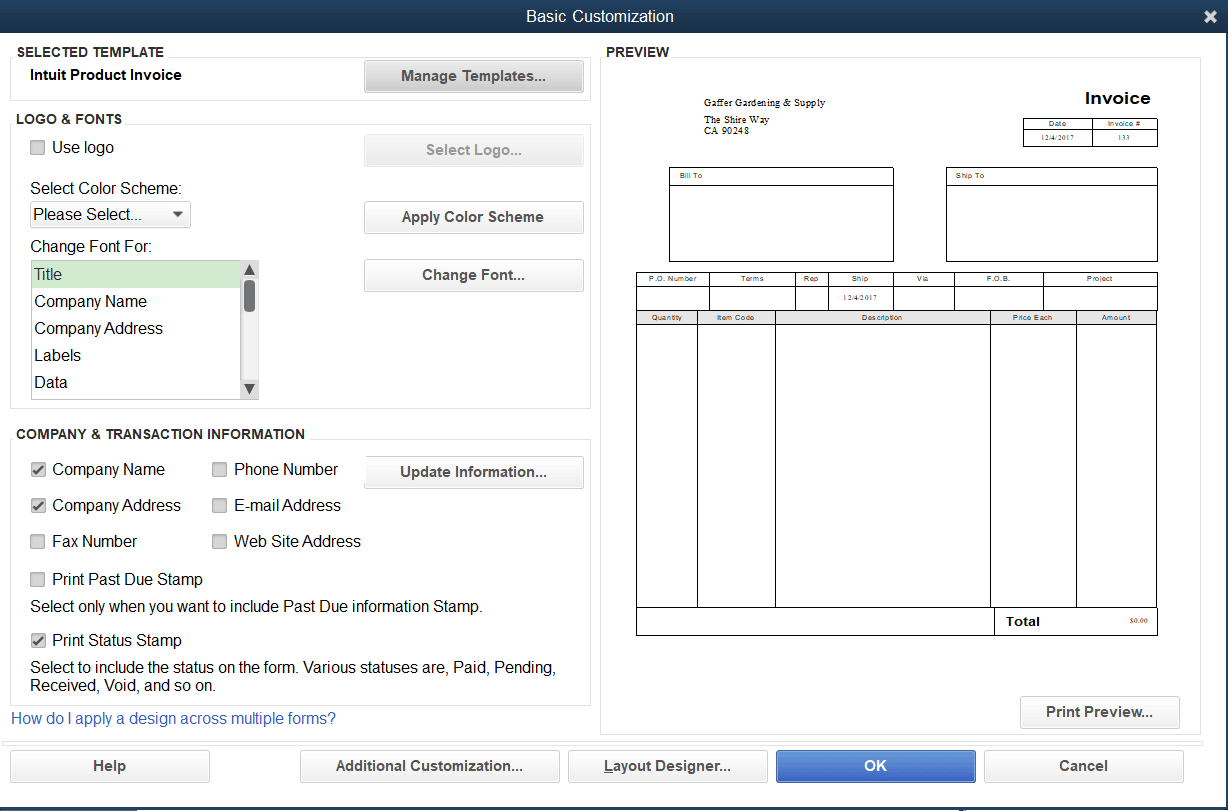
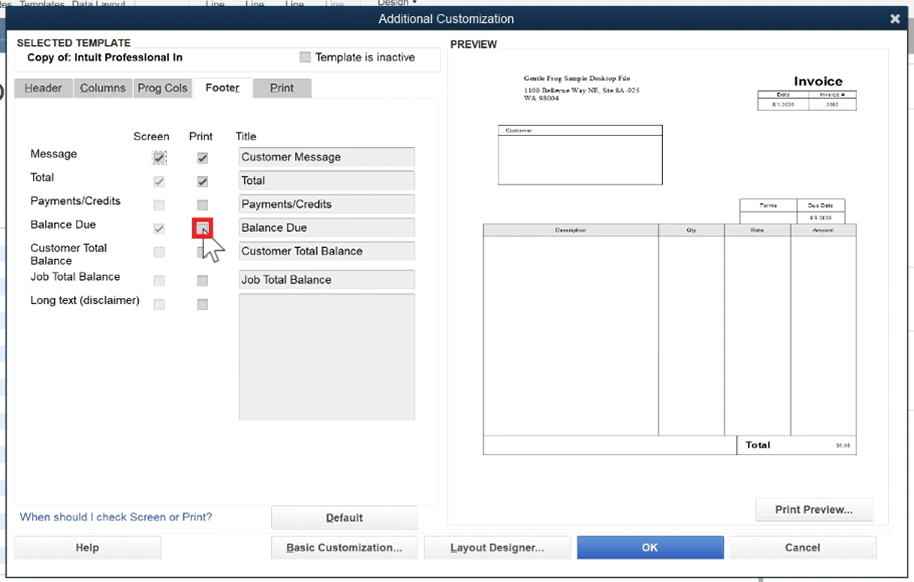
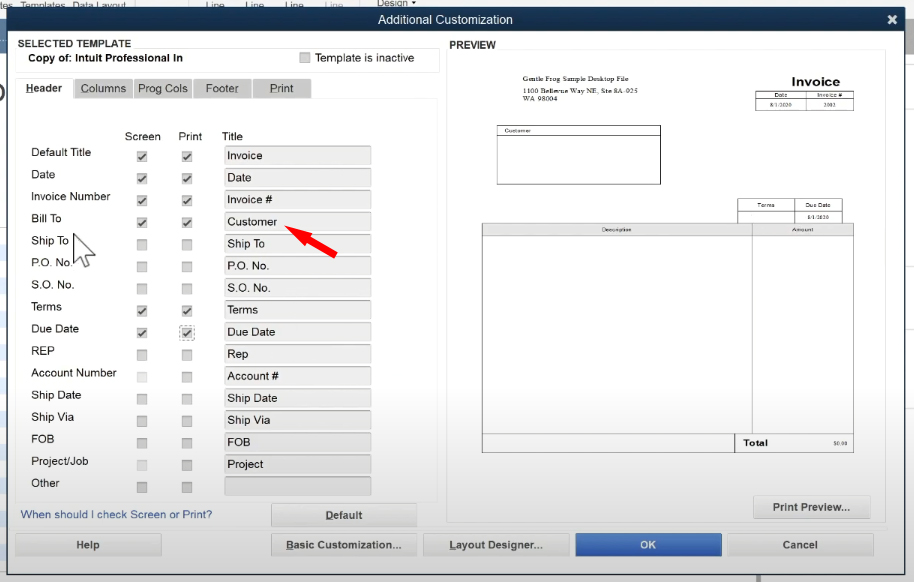
How To Modify Invoice Template In Quickbooks - From the bottom portion of the create invoice window, click the customize link. Select the invoice template you want to use. Then, click on new style and choose invoice. To create a personalized template, follow the steps below for how to change invoice format in quickbooks. In the save as type. Open your quickbooks then go to the menu bar and click on. Access your quickbooks account through the desktop application or online. Click the new icon (+). Navigate to the gear icon: Click on the gear icon in the top right corner to. Select the invoice template you want to use. Customize invoices, estimates, and sales receipts in quickbooks online. You can choose the invoice template before you create it. **how to change invoice template in quickbooks | full guide 📄 | master invoice customization in 2025**enhance the professionalism and branding of your invo. Click on the gear icon in the top right corner to. Navigate to the gear icon: Then, click on new style and choose invoice. See this page for more details: Changing the invoice template in quickbooks desktop enables businesses to modify the visual layout, incorporate branding elements, and customize the communication style for professional. This way, you can open a new copy whenever you need to create an invoice. Access your quickbooks account through the desktop application or online. From changing colors to adding various forms of typography, or even adding a logo, now you can edit the invoice template in quickbooks. You can follow the steps in this article to add a new template: Log into quickbooks account and select the gear menu, then click on setting. Want. Save your invoice as a template file. So whether you want to add a new line or change. From changing colors to adding various forms of typography, or even adding a logo, now you can edit the invoice template in quickbooks. We will discuss how to edit the invoice template in quickbooks online and give tips on how to customize. To create a personalized template, follow the steps below for how to change invoice format in quickbooks. Click on the gear icon in the top right corner to. You can follow the steps in this article to add a new template: This way, you can open a new copy whenever you need to create an invoice. From the bottom portion. Log into quickbooks account and select the gear menu, then click on setting. Here's how to select a form style when. We will discuss how to edit the invoice template in quickbooks online and give tips on how to customize it to suit your needs. So whether you want to add a new line or change. This way, you can. So whether you want to add a new line or change. To create a personalized template, follow the steps below for how to change invoice format in quickbooks. This way, you can open a new copy whenever you need to create an invoice. Log into quickbooks account and select the gear menu, then click on setting. Click on the gear. You can choose the invoice template before you create it. If you don't have don't have the old layout option and want to get your. Customize invoices, estimates, and sales receipts in quickbooks online. We will discuss how to edit the invoice template in quickbooks online and give tips on how to customize it to suit your needs. Changing the. Here's how to select a form style when. Customize invoices, estimates, and sales receipts in quickbooks online. Changing the invoice template in quickbooks desktop enables businesses to modify the visual layout, incorporate branding elements, and customize the communication style for professional. Customize invoices, estimates, and sales receipts in quickbooks online. Open your quickbooks then go to the menu bar and. Open your quickbooks then go to the menu bar and click on. Navigate to the gear icon: Want your invoices to stand out and reflect your brand? Start by creating and importing your. Click on the gear icon in the top right corner to. You can follow the steps in this article to add a new template: See this page for more details: Access your quickbooks account through the desktop application or online. To create a personalized template, follow the steps below for how to change invoice format in quickbooks. If you don't have don't have the old layout option and want to get. In the save as type. Want your invoices to stand out and reflect your brand? Then, click on new style and choose invoice. You can follow the steps in this article to add a new template: So whether you want to add a new line or change. We will discuss how to edit the invoice template in quickbooks online and give tips on how to customize it to suit your needs. Then, click on new style and choose invoice. You can choose the invoice template before you create it. Customize invoices, estimates, and sales receipts in quickbooks online. Here's how to select a form style when. Click the new icon (+). Access your quickbooks account through the desktop application or online. Select the invoice template you want to use. **how to change invoice template in quickbooks | full guide 📄 | master invoice customization in 2025**enhance the professionalism and branding of your invo. From the bottom portion of the create invoice window, click the customize link. Go to file > save as. Customize invoices, estimates, and sales receipts in quickbooks online. You can follow the steps in this article to add a new template: See this page for more details: To create a personalized template, follow the steps below for how to change invoice format in quickbooks. Click on the gear icon in the top right corner to.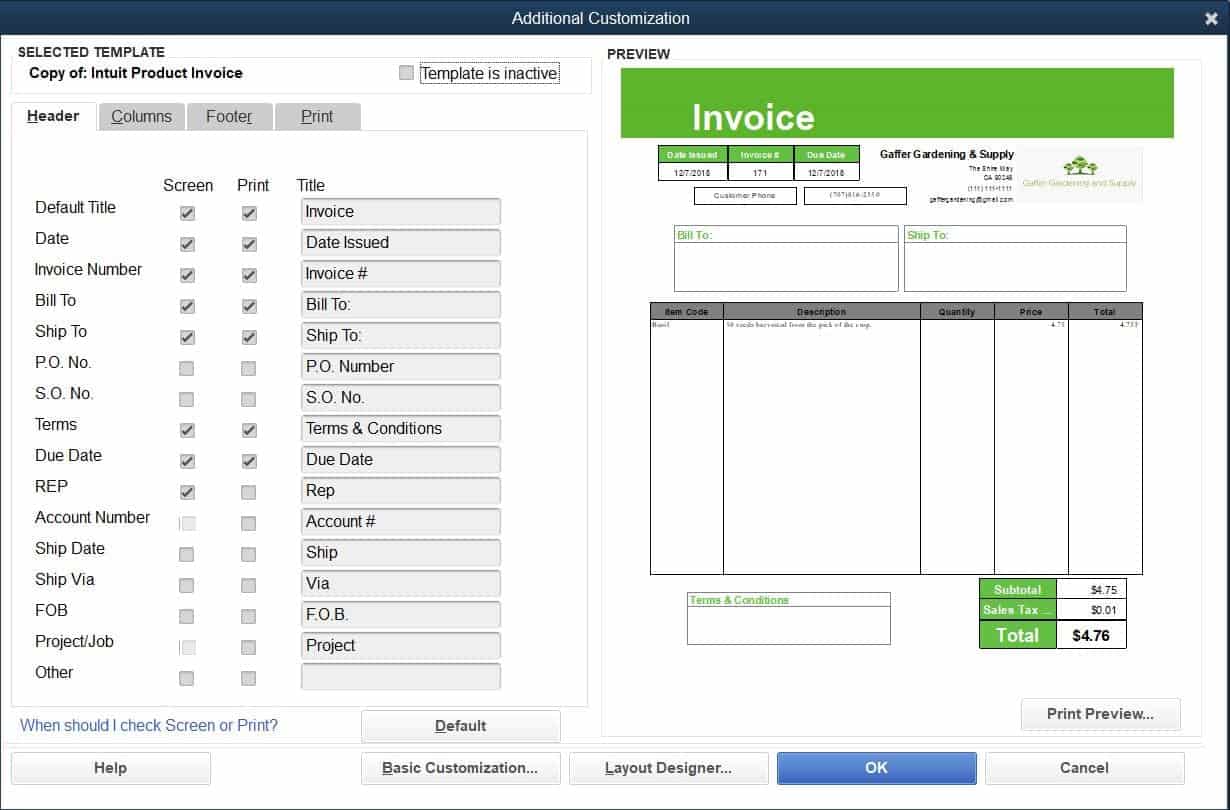
How To Change Invoice Template In Quickbooks
How To Change Invoice Template In Quickbooks
How To Change Invoice Template In Quickbooks
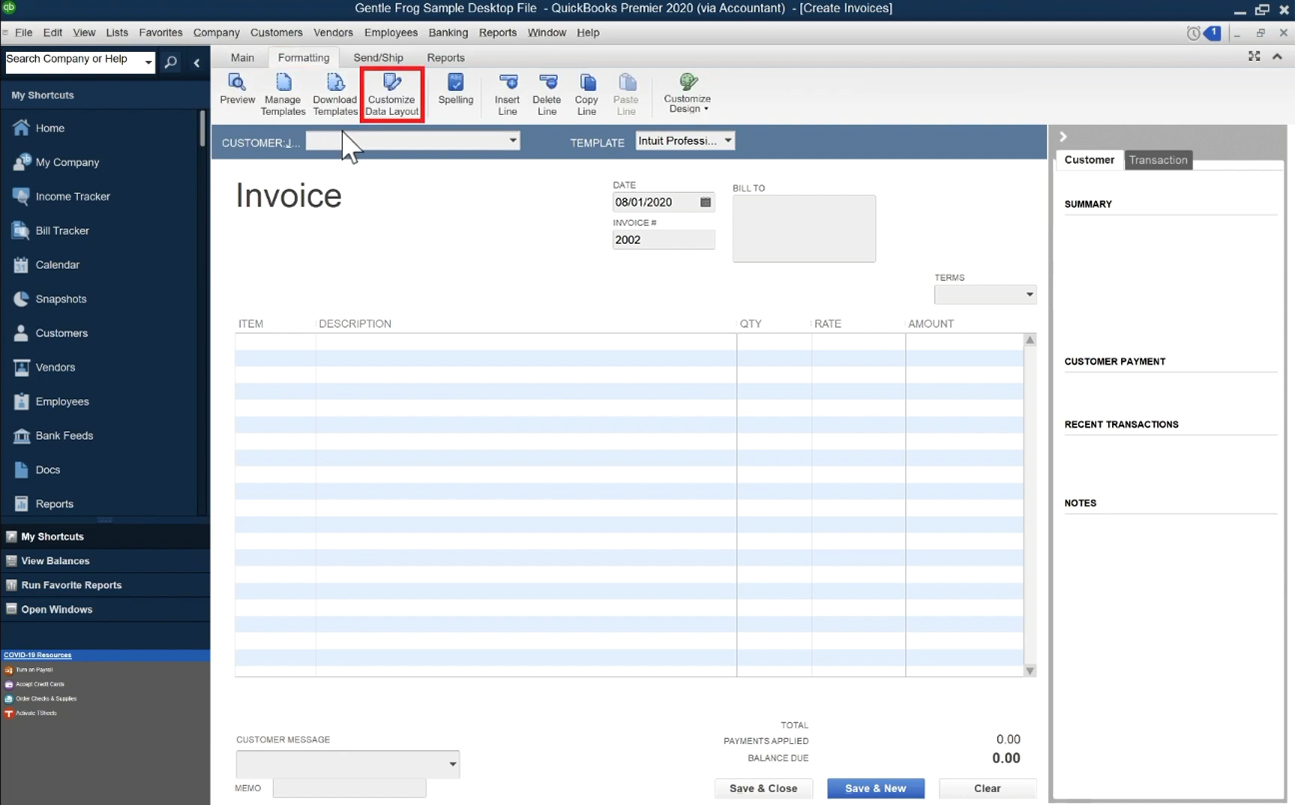
How to Customize the Invoice Template in QuickBooks Premier Part 1
How To Customize Invoice Templates In Quickbooks Pro with Create

How To Change Invoice Template In Quickbooks
How To Customize Invoices in QuickBooks Online
How to Customize the Invoice Template in QuickBooks Premier Part 1
How to Customize the Invoice Template in QuickBooks Premier Part 1

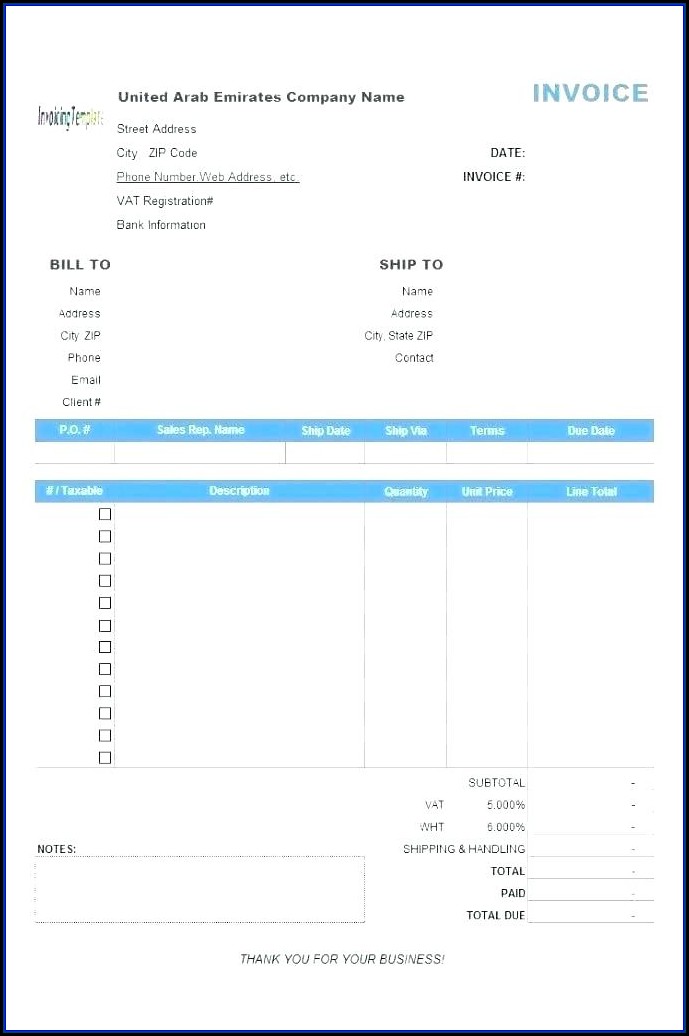
Quickbooks Online Invoice Template Change Template 1 Resume
From Changing Colors To Adding Various Forms Of Typography, Or Even Adding A Logo, Now You Can Edit The Invoice Template In Quickbooks.
Start By Creating And Importing Your.
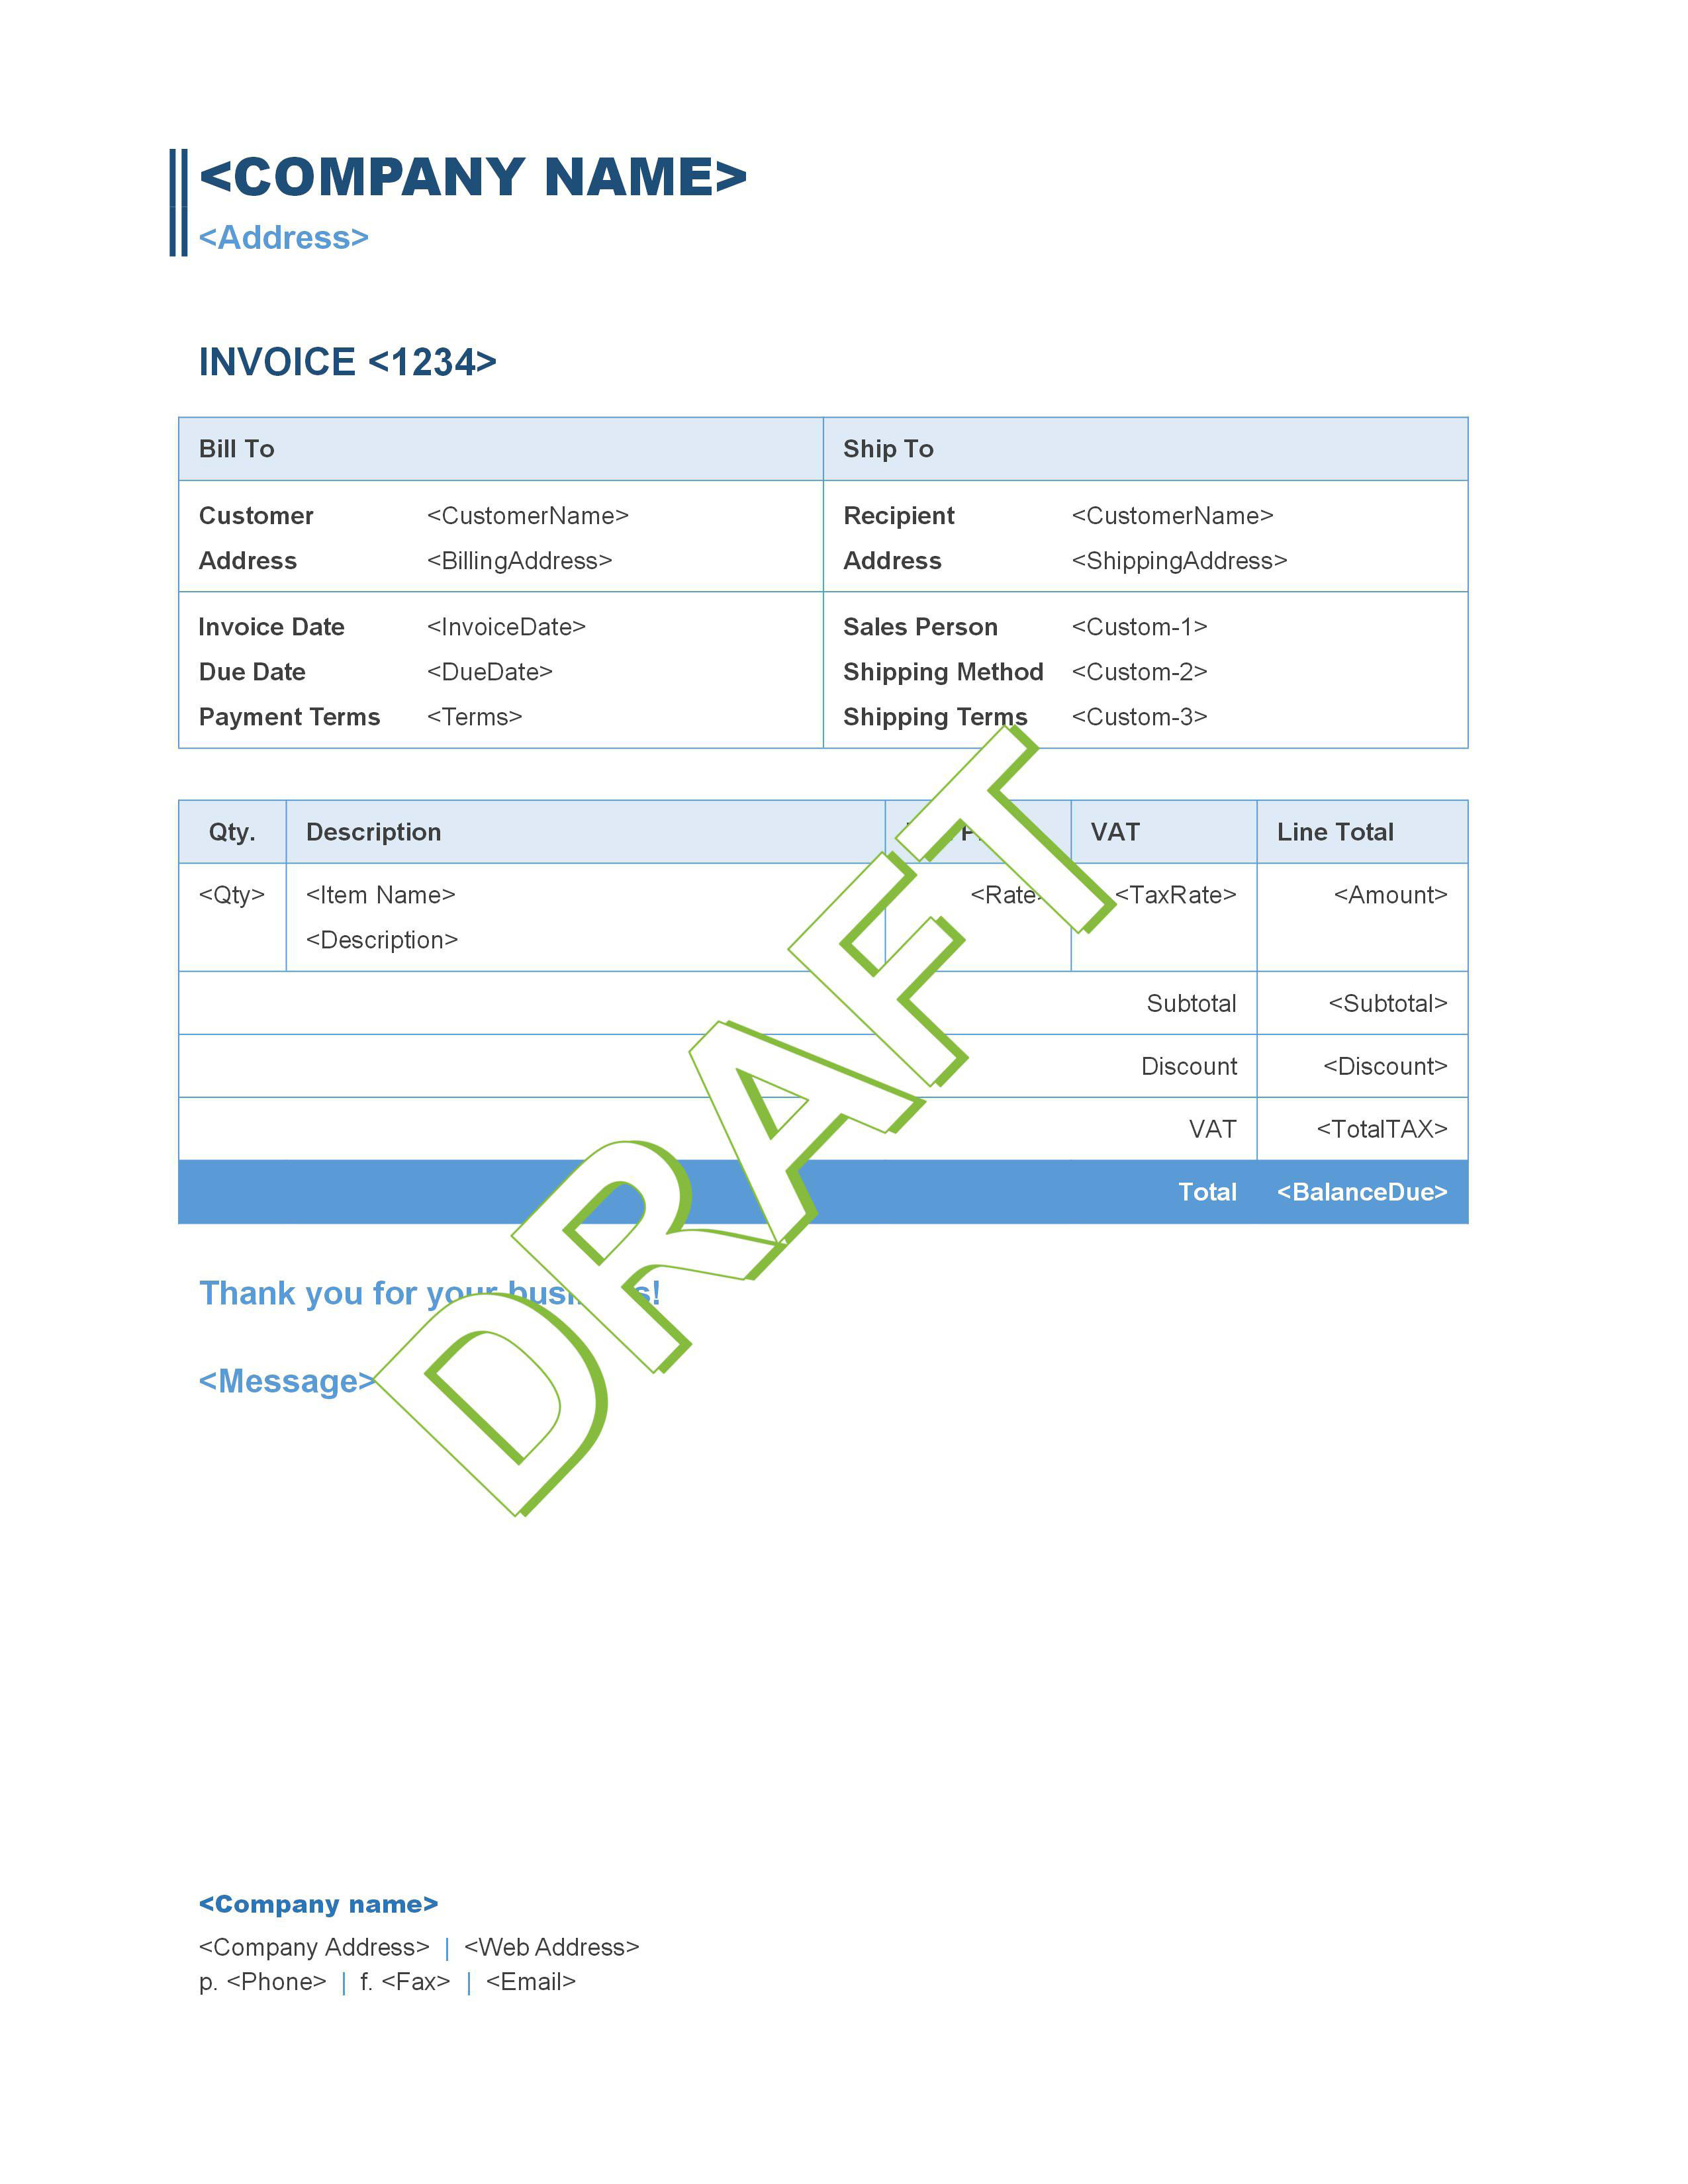
So Whether You Want To Add A New Line Or Change.
In The Save As Type.
Related Post: